Course Guide
Course Guide | Scorecard | History & Area | Video Tour
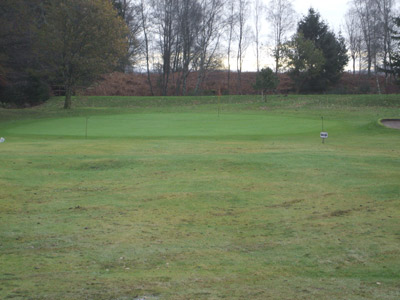
To see more details of a particular hole, click the hole number.
Callander Golf Course
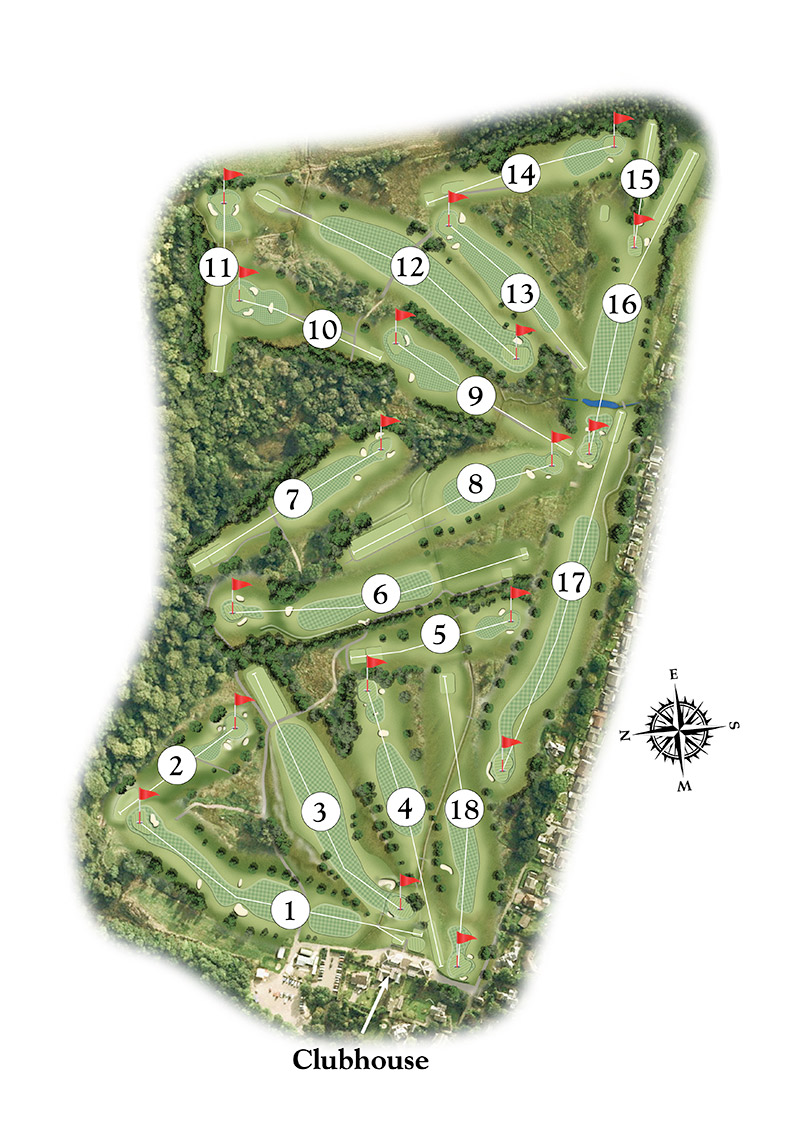
Lying at the entrance to the Loch Lomond and The Trossachs National Park, the course consists of stylish wooded parkland with panoramic views to Ben Ledi. The 15th is one of the most famous par 3s in Scotland.
To see more details of a particular hole, click the hole number. Yardage posts are located 100 yards and 150 yards from the centre of the greens.
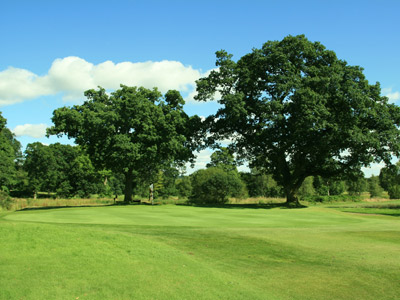
Hole One

Quarry
The first hole is a par 4 with fairway bunkers right and left. Your first shot is a dilemma - do you play short, through or over the bunkers. The plateau green is protected by a bunker to the right.
Tip: aim your approach shot at the big rock behind the green.
![]() White: 337 yds Par 4
White: 337 yds Par 4
![]() Yellow: 317 yds Par 4
Yellow: 317 yds Par 4
![]() Red: 331 yds Par 4
Red: 331 yds Par 4
Hole Two

Corner
The second hole is deceptive. Accuracy both in line and distance is the key to obtaining par or better. Pull to the left or push to the right and you could be in trouble. However, remember there is no trouble over the green.
![]() White: 199 yds Par 3
White: 199 yds Par 3
![]() Yellow: 148 yds Par 3
Yellow: 148 yds Par 3
![]() Red: 161 yds Par 3
Red: 161 yds Par 3
Hole Three

Tree
The third hole is relatively straightforward. Drive to the marker and the green opens out in front of you.
Tips: play to the right for a clear second shot. For big hitters, aim between the Pro’s shop and the lounge to have a chance to catch the green. The green itself tends to run right to left.
![]() White: 327 yds Par 4
White: 327 yds Par 4
![]() Yellow: 287 yds Par 4
Yellow: 287 yds Par 4
![]() Red: 321 yds Par 4
Red: 321 yds Par 4
Hole Four
Oaks
The fourth is protected by trees right and left and a large fairway bunker within reach of the longer hitters.
Tip: aim your approach shot left of the flag.
![]() White: 320 yds Par 4
White: 320 yds Par 4
![]() Yellow: 284yds Par 4
Yellow: 284yds Par 4
![]() Red: 294 yds Par 4
Red: 294 yds Par 4
Hole Five

Saucer
The fifth is a par 3 over a hidden fairway ditch, with greenside bunkers left and right. Length and accuracy are important to hold the saucer green to secure your birdie or par.
![]() White: 185 yds Par 3
White: 185 yds Par 3
![]() Yellow: 167yds Par 3
Yellow: 167yds Par 3
![]() Red: 177 yds Par 3
Red: 177 yds Par 3
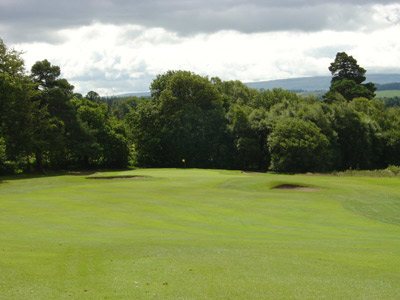
Hole Six

Dell
The sixth is a classic hole, between trees, to a well-protected plateau green.
Tips: for a clear approach, a drive must be on the left half of the fairway. For the higher handicapper, lay-up short of the fairway bunker.
![]() White: 373 yds Par 4
White: 373 yds Par 4
![]() Yellow: 315 yds Par 4
Yellow: 315 yds Par 4
![]() Red: 365 yds Par 5
Red: 365 yds Par 5
Hole Seven
Blind
The seventh involves a blind shot between trees, with fairway bunker on the left and a lateral water hazard to the right. The raised green sits through a narrow opening with trees on either side and burns to left and right at the rear.
Tip: the fairway slopes left to right so favour the left side of the marker post.
![]() White: 300 yds Par 4
White: 300 yds Par 4
![]() Yellow: 279 yds Par 4
Yellow: 279 yds Par 4
![]() Red: 291 yds Par 4
Red: 291 yds Par 4
Hole Eight

Burn
The secret to scoring well at the eighth is the approach shot to the green - you require to play short and run on or pitch with backspin and hold.
![]() White: 296 yds Par 4
White: 296 yds Par 4
![]() Yellow: 247 yds Par 4
Yellow: 247 yds Par 4
![]() Red: 247 yds Par 4
Red: 247 yds Par 4
Hole Nine

Curling House
The ninth is a long par 3 to a plateau green, protected by a greenside bunker on the right.
Tip: you can take a free drop if you land short of the blue post markers.
![]() White: 231 yds Par 3
White: 231 yds Par 3
![]() Yellow: 225 yds Par 3
Yellow: 225 yds Par 3
![]() Red: 222 yds Par 4
Red: 222 yds Par 4
Hole Ten

Knowe
The tenth is another deceptive hole - the front bunker looks nearer than it is. A hog’s back green awaits to test your putting.
![]() White: 179 yds Par 3
White: 179 yds Par 3
![]() Yellow: 165 yds Par 3
Yellow: 165 yds Par 3
![]() Red: 165 yds Par 3
Red: 165 yds Par 3
Hole Eleven
Beeches
The eleventh is another classic, with a shot over a stream to a green protected by bunkers left and right. A birdie opportunity.
![]() White: 181 yds Par 3
White: 181 yds Par 3
![]() Yellow: 159 yds Par 3
Yellow: 159 yds Par 3
![]() Red: 169 yds Par 3
Red: 169 yds Par 3
Hole Twelve

Three Firs
At Stroke Index 2, the twelfth requires a straight tee-shot to the top of the rise and an accurate second to a green protected by a bunker on the left.
Tip: as you approach the green, look right and admire the stunning views to the Ben Ledi.
![]() White: 404 yds Par 4
White: 404 yds Par 4
![]() Yellow: 332 yds Par 4
Yellow: 332 yds Par 4
![]() Red: 360 yds Par 4
Red: 360 yds Par 4
Hole Thirteen

Drumdhu
Thirteen sits on a plateau green with bunkers left and right.
Tip: judging distance with your approach is key.
![]() White: 326 yds Par 4
White: 326 yds Par 4
![]() Yellow: 226 yds Par 3
Yellow: 226 yds Par 3
![]() Red: 225 yds Par 4
Red: 225 yds Par 4
Hole Fourteen
Dyke
At fourteen, there is an out-of-bounds to the left and trouble on the right, so length and accuracy are important.
Tip: avoid the tree on the left – it has caught out many golfers.
![]() White: 225 yds Par 3
White: 225 yds Par 3
![]() Yellow: 199 yds Par 3
Yellow: 199 yds Par 3
![]() Red: 199 yds Par 3
Red: 199 yds Par 3
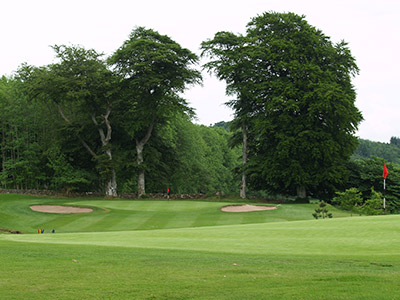
Hole Fifteen

Avenue
Fifteen is the Course’s ‘Signature Hole’ – through an avenue of trees with Ben Ledi standing tall behind. A classic short par 3.
![]() White: 136 yds Par 3
White: 136 yds Par 3
![]() Yellow: 121 yds Par 3
Yellow: 121 yds Par 3
![]() Red: 97 yds Par 3
Red: 97 yds Par 3
Hole Sixteen

Balgibbon
At sixteen, land your tee-shot short of the pond on the widest fairway on the course and pitch to the green.
Tip: overshoot and you will land in a hidden bunker.
![]() White: 362 yds Par 4
White: 362 yds Par 4
![]() Yellow: 283 yds Par 4
Yellow: 283 yds Par 4
![]() Red: 273 yds Par 4
Red: 273 yds Par 4
Hole Seventeen

Mount Pisgah
Seventeen is a longish hole to a green perched on top of ‘Mount Pisgah’ (looking to the ‘Promised Land’ of the clubhouse) with a bunker on the right.
Tip: the fringe from the top of the rise to the putting surface is around fifteen paces.
![]() White: 491 yds Par 5
White: 491 yds Par 5
![]() Yellow: 378 yds Par 4
Yellow: 378 yds Par 4
![]() Red: 384 yds Par 5
Red: 384 yds Par 5
Hole Eighteen

Home
Eighteen and ‘Home’ is a relatively straight-forward par 4, until you reach the green. This has been likened to Augusta by a local ‘Master’.
Tip: the green runs right to left and an uphill putt is desirable. The rest is up to you!
![]() White: 336 yds Par 4
White: 336 yds Par 4
![]() Yellow: 317 yds Par 4
Yellow: 317 yds Par 4
![]() Red: 332 yds Par 4
Red: 332 yds Par 4


